Compatibility:
WebSite X5 Evo and Pro
When using a new software program, one of the first challenges is understanding where to find the tools you need and how to navigate the interface.
With WebSite X5, this process is particularly simple because the entire program is organized as a guided procedure that takes you step by step through the creation of your website.
The workspace maintains a consistent structure throughout all phases of the project: once you understand how it is organized, you will be able to move quickly between the different functions and work with greater confidence.
In this guide, we will look at:
- The Welcome window
- How the interface is organized
- The 5 Project Steps
- Where to find the main commands
- Where to find help while you work
- How to customize the workspace
#tip - If this is your first time using the program, it may be useful to also read the guide WebSite X5. How do you create a professional website without coding? to understand the overall workflow.
The Welcome Window
After starting WebSite X5, the first screen that appears is the Welcome Window.

From here, you can quickly access the main activities:
- view information about your user profile;
- create a new project;
- open an existing project;
- access the program preferences;
- check for available updates;
- consult useful content, resources, and information.
The central area of the window is updated dynamically and may display:
- guides and tutorials;
- news about the software;
- in-depth articles;
- new templates and available Objects;
- offers and promotions.
The Welcome Window is therefore the starting point for all the activities you will carry out with WebSite X5.
How the interface is organized
After creating (using a template or with the help of the AI assistant MagicSite) or opening a project, you enter the actual workspace.
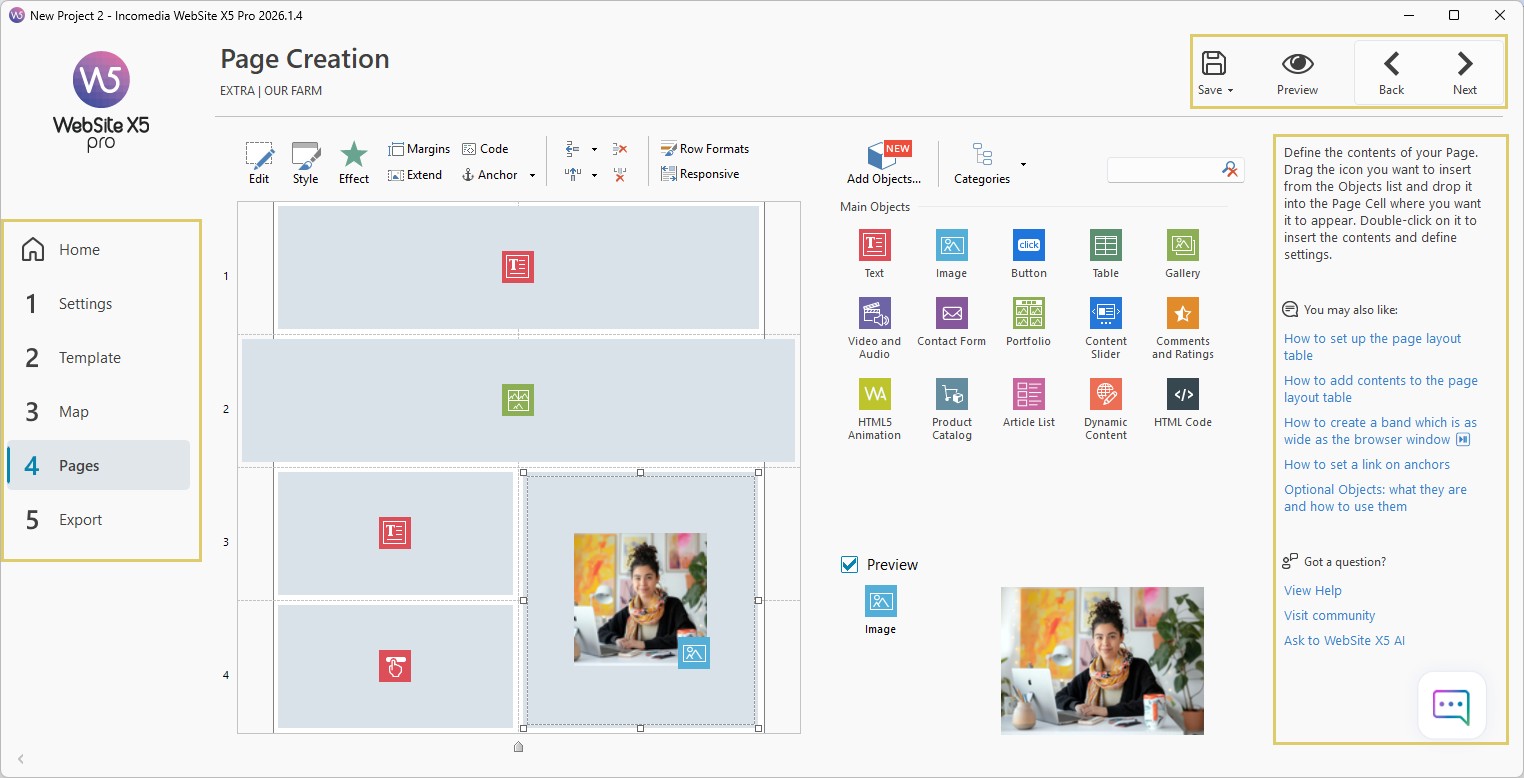
The interface has been designed to be simple and intuitive and consists of four main areas:
- Top Bar
It contains commands that may be useful at any time, regardless of the project phase you are working on.
- Sidebar
It displays the Steps that make up the project and allows you to always know which phase you are currently in.
- Central Area
This is the part of the interface that changes according to the activity you are performing. Here you add contents, configure settings, and manage the project.
- Tips Bar
When enough space is available, a bar is displayed on the right side offering contextual explanations, guides, and support tools.
This organization remains virtually unchanged throughout the entire workflow, making it easier to navigate even the most complex projects.
The 5 Project Steps
The entire website creation process is organized into 5 main Steps.
Each Step corresponds to a specific activity and contributes to the completion of the project.
- Step 1 - Website Settings
Here you define the general project information, such as the website name, SEO settings, and the main configurations.
- Step 2 - Template
At this stage, you work on the website design, customizing templates, headers, footers, colors, and the overall style.
- Step 3 - Map
Here you organize the website structure by creating pages, menus, and navigation levels.
- Step 4 - Page Creation
This Step is dedicated to contents: texts, images, videos, galleries, forms, and all the elements that make up the pages.
- Step 5 - Export
Once the project is complete, you can publish the website online.
#tip - You do not need to complete one Step before moving on to the next. You can freely move between the different sections of the project and modify settings whenever necessary.
Where to find the main commands
Some tools are used very frequently during website development. For this reason, they are always available in the top bar.
The main commands are:
 Save [CTRL+S], to store the changes made to the project;
 Preview, to check the website before publishing it;
 Back /
  Next, to quickly move between different screens;
 Help, to access support resources when the Tips Bar is not visible.
Among these, the Preview button is probably the one you will use most often. It allows you to check the website at any time and immediately verify the effect of any changes you make.
#tip - Get into the habit of using the Preview command frequently: it will help you identify any corrections that need to be made right away.
Where to find help while you work
While creating your website, you may have questions about a feature or want to learn more about a specific topic.
For this reason, WebSite X5 provides several support tools directly within the interface.
When visible, the Tips Bar offers:
- a brief explanation of the current screen;
- links to the most relevant guides;
- access to the complete online Help;
- links to the Community of users and moderators;
- access to the AI Chat dedicated to WebSite X5.
This system allows you to quickly find information and insights without interrupting your work on the project.
#tip - Before looking elsewhere for a solution, always check the suggestions offered in the sidebar: you will often find the answer to your question there.
Customize your workspace
You can adapt the WebSite X5 interface to your preferences by changing the size of the workspace window.
If you work on very large monitors, you can use the program in full-screen mode and keep the Tips Bar always visible.
If you prefer a more compact window, you can freely resize it using the standard Windows controls or by dragging its borders with the mouse to make it narrower or wider.
The Steps bar can also be reduced to occupy less space: in this way, only the Step numbers will be displayed instead of their descriptions.
These are small customizations that can help you make better use of the available space and improve your overall working experience.
Practical tips
When you first start using WebSite X5, there is no need to memorize all the available features right away.
To work more effectively:
- first become familiar with the 5 project Steps;
- use Preview frequently to check the results;
- consult the guides suggested in the Tips Bar;
- do not be afraid to return to previous Steps to make changes.
After a short time, you will discover that the interface follows a very intuitive logic and that many operations become natural.
In summary
The WebSite X5 workspace has been designed to guide you step by step through the creation of your website.
Thanks to a consistent interface, the 5 project Steps, and numerous built-in support tools, you can easily find your way around the various functions and focus on building your website without worrying about the more technical aspects.
Once you become familiar with the interface, working with WebSite X5 will become fast, natural, and increasingly efficient.