Compatibility:
WebSite X5 Evo and Pro
Do you want to highlight part of the Page, visually separate different contents, or create a large graphic strip that guides visitors as they scroll?
After organizing the Page into Sections, with WebSite X5 you can easily customize their appearance: you can apply a background, add an Overlay, increase the space above and below the contents, define a border, or create a shaped separation between two Sections.
You can also graphically link multiple adjacent Sections: they will continue to have independent row and column structures but, to visitors, they will appear as a single continuous block.
#tip - Sections are defined directly in the Layout Grid. If you don't yet know how to create and manage them, see Page Sections. How do you create layouts with different structures?
How to set the style of a Section
To create a strip and graphically customize a Section:
- Go to Step 4 - Pages and open the Page you want to work on.
- After organizing the contents and defining the necessary Sections, click the
 Section Style button on the Toolbar.
 - In the Grid displayed in the Section Style window, select the Section you want to customize.
- Choose whether you want to use the following as the Background:
- a color;
- a gradient;
- an image;
- an image list;
- an animation;
- a video;
- a map.
- Use the options available for the selected background type to import the necessary files and define their appearance.
#tip - Accessibility. To make your website pages accessible, consider providing alternative text for the images and videos you use. You can mark an element as "decorative" or enter ALT text by clicking thebutton available in the field where you import the file. For more information, see Image accessibility: the importance of alternative text.
If you want to further customize the strip, you can apply a Border to the Section and define:
- the color;
- the thickness;
- the bevel;
- the shadow.
#tip - If you apply a Shadow, make sure there is enough space around the Section for the effect to be fully visible. If necessary, increase the top and bottom Margins.
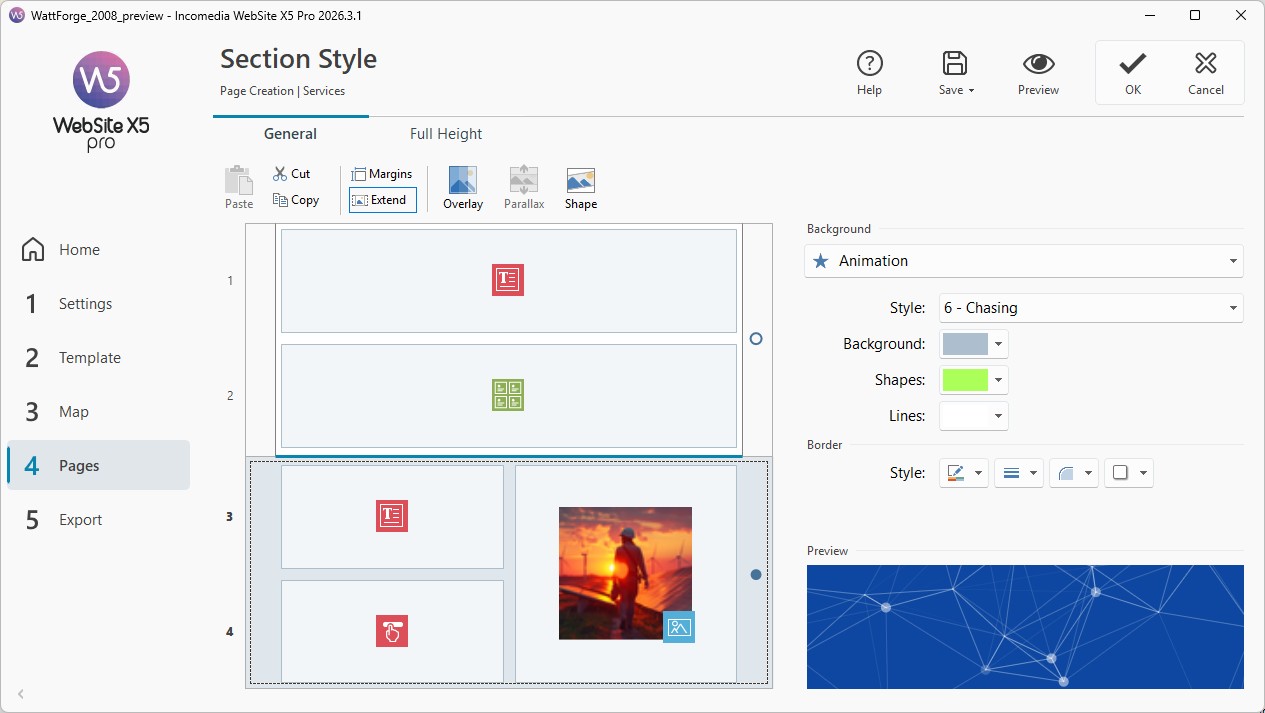
In the Section Style window, you can easily distinguish the Sections to which you have already applied a style:
- Sections whose appearance has not yet been defined are marked with an empty dot;
- Sections whose appearance has already been defined are marked with a filled dot.
How to create a shaped separation between two Sections
If you want to make the transition between one Section and the next more distinctive, you can replace the standard straight separation with a Shape.
The Shape is applied to the bottom of the selected Section and creates a graphic transition with the following one. You can use it regardless of the type of background applied to the Section, for example a color, gradient, or image.
To proceed:
- Select the Section in the Section Style window.
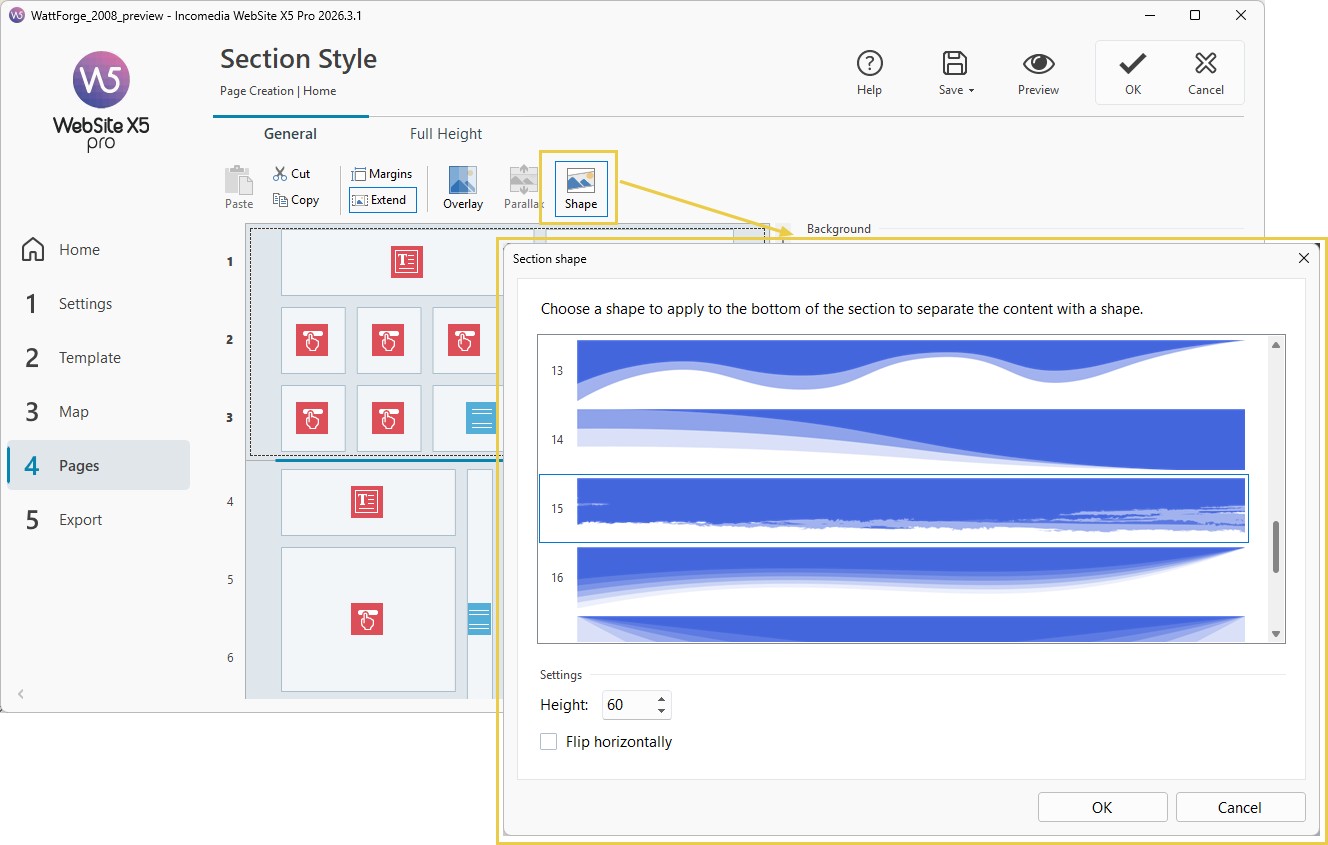
- Click the
 Shape command.
 - In the Section Shape window, choose one of the available shapes.
- Set the Height to define how pronounced the shape should be.
- If you want to flip the shape horizontally, activate Flip Horizontally.
- Confirm with OK.
To restore a straight separation between the Sections, select None.
The Shape only changes the graphic appearance of the transition between the two Sections: it does not create new Sections or change the Page structure.
How to apply the same style to multiple Sections
Two or more adjacent Sections can have different column structures but, from a graphic point of view, be part of the same strip.
To apply the same style to them:
- In the Grid of the Section Style window, identify the Sections you want to link.
- Move the mouse over the line separating them.
- Click the displayed lock icon to link them.
- Repeat the operation if you want to link other adjacent Sections.
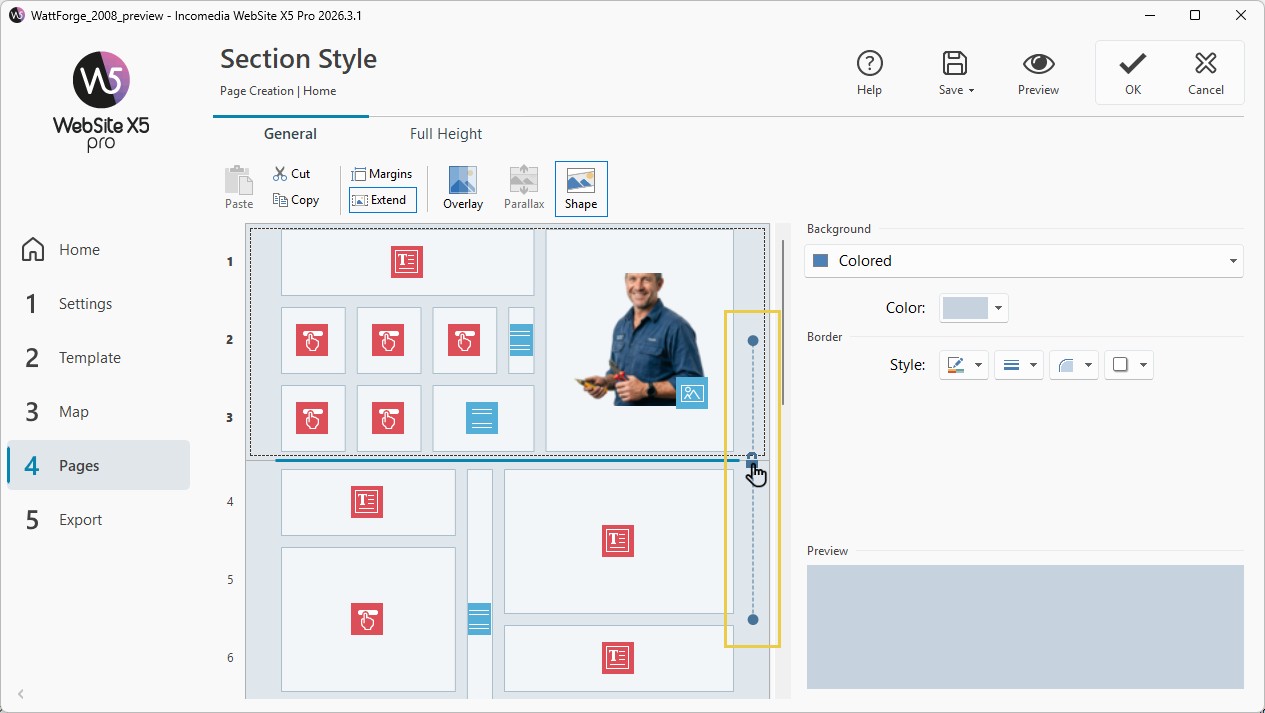
Two or more linked Sections remain independent in the Layout Grid and can therefore continue to have a different number and width of columns, but they share the same graphic appearance.
This way, for example, you can create a continuous strip made up of a Section with 2 columns followed by one with 3 columns.
How to increase the space above and below a Section
If you want to increase the separation between a Section and the previous or following one, you do not need to add a Separator Object or adjust the margins of individual Objects.
You can directly use the Section Margins:
- Select the Section in the Section Style window.
- Click the
 Margins command.
 - In the Section Marginswindow, set:
- Top, to define the space above the Section;
- Bottom, to define the space below the Section.
- Confirm with OK.
If you have graphically joined two or more Sections, the Intermediate Sections value also appears in the window, allowing you to define the space to keep between the Sections that belong to the same group.
By default, this value is 0, so the joined Sections visually form a single continuous block. If you want to keep more separation between the Sections in the group, you can increase it.
Margins increase the space before and after the Section and help visually distinguish different content blocks.
This way, the space remains associated with the Section rather than with an individual Object: if you later change or rearrange the contents, you do not need to set the margins again.
How to copy the style of a Section
If you have set up a style that you want to reuse, you do not need to recreate it from scratch. You can cut, copy, and paste it onto another Section on the same Page or on a different Page.
To do this, you can:
- select the Section and use the Cut, Copy, and Paste buttons on the Toolbar;
- or right-click the Section and use the Cut, Copy, and Paste commands available in the context menu.
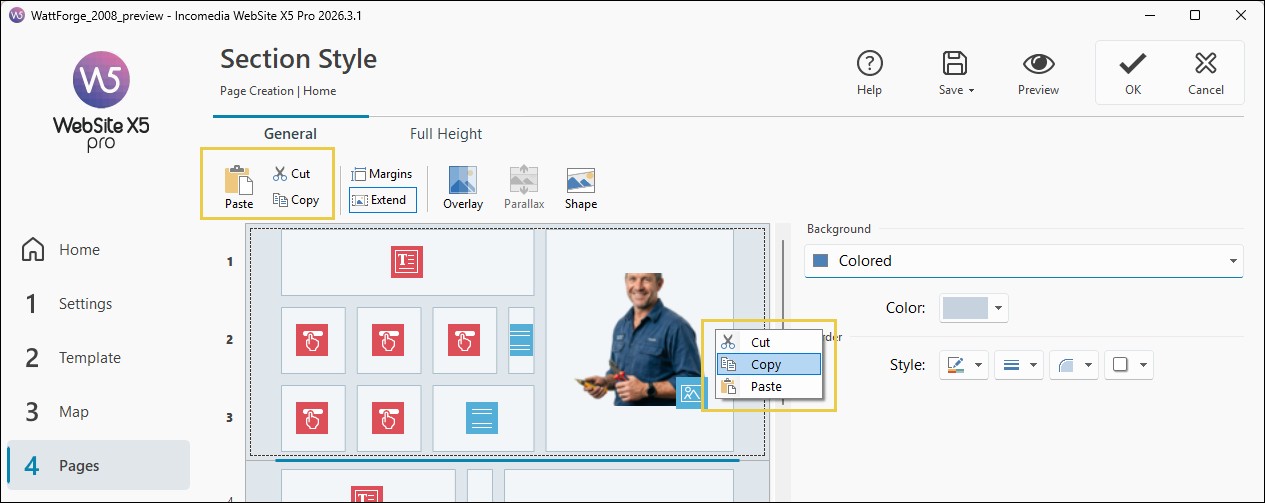
In this case, only the graphic style of the Section is copied, not the Objects or the row and column structure it contains.
#tip - If you also want to copy the structure and contents of a Section, you need to use the commands for copying and pasting the entire Section directly in the Layout Grid. See Page Sections. How do you create layouts with different structures?
How to create strips with more advanced effects
Regardless of the type of background you choose, you can also apply an Overlay effect to the Section, i.e. a colored filter placed over the background:
- Select the Section in the Section Style window.
- Click the
 Overlay button on the toolbar.
 - Use the settings in the window that opens to define the colors and opacity and, if you want, activate a looping transition between the selected colors.
- Confirm the settings.
The Overlay is not the only graphic effect you can use to make the strips on your pages more appealing.
In particular, you can also:
- extend the strip to the edges of the Browser window, regardless of the content width (see How do you create a full-width strip?);
- apply a parallax effect to the background (see Parallax effect. How do you create a background that moves while scrolling?);
- make a Section fill the entire height of the Browser window and create slide-style scrolling (see Full Height. How do you create slide-style page scrolling?).
In summary
With Section Style, you can turn the structural parts of the Page into actual graphic strips. You can define the background, use an Overlay, add Margins and Borders, create shaped separations with Shapes, link multiple Sections to obtain a single visual block, or copy a style you have already set and reuse it elsewhere.
The structure of the Sections remains independent of their appearance: Sections with a different number of columns can therefore share the same graphic style.